

|
| Detailed Description |
goto:
|
Using Reflex DataVault Encryption
Open encrypted documents
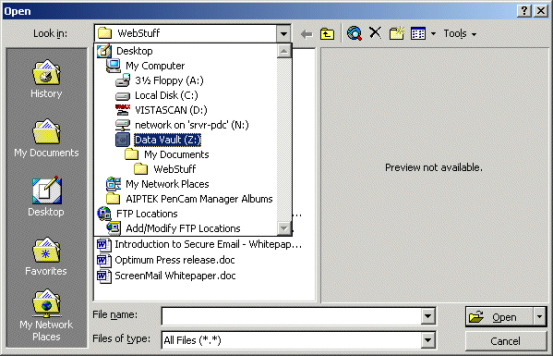
As Reflex DataVault appears as a standard hard disk within My Computer and Windows Explorer standard mechanisms can be used to access and save data within the encrypted drive. |
[Full Screenshot]
|
| Note that the destination drop-down is open - this is where you would normally select a hard disk. The highlighted item in the list is the DataVault icon (a safe). If you wish to open or save your work on an encrypted drive, this is a quick way to locate all available DataVault drives on local or networked hard disks. |
Saving encrypted documents
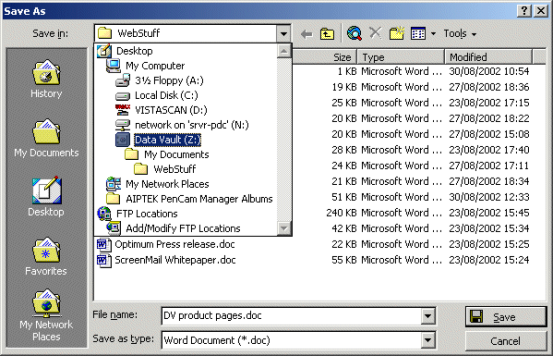
As data is saved to the Reflex DataVault drive, it is automatically encrypted as it is saved.
The Reflex DataVault encrypted drive once unlocked will appear like any other hard disk on the system. The Reflex DataVault drive is easily identifiable by a "Safe" icon and the description "DataVault". Double-clicking on the encrypted drive will show the contents as folders and files, just as you would see them normally. If you haven't already unlocked the drive you can unlock it in either the Open or Save dialogues, by right (option) clicking on the icon and selecting Unlock from the popup menu.
[Full Screenshot]
Unlocking & Locking a Reflex DataVault
On logon as the "desktop" is loaded the unlock dialog will be displayed as shown below. The user must enter his/her password or pass phrase to gain access to encrypted drive.
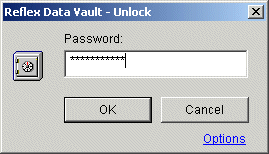 |
Entering the correct password here will unlock the Reflex DataVault encrypted drive so that it is ready for use. If you have selected a Windows screensaver to "activate" after x period of inactivity the Reflex DataVault drive will be automatically locked and will need to re-enter this password again to regain access.
|
|
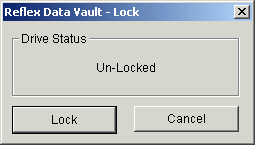
Right clicking on an unlocked Reflex DataVault drive can be used to lock a drive on demand.
|
|
Forgotten Your Password?
Providing a backup of the encryption key was taken during installation it is possible to re-set the password via a secure Challenge Response system or locally on the workstation providing logged on with local administration rights.
Administrator Options
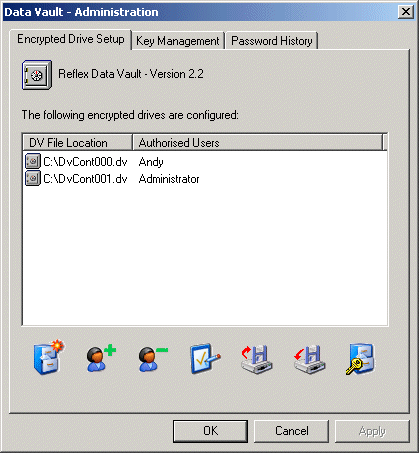
As an administrator of Reflex DataVault there are a number of operations that can be performed from the Control Panel applet. See below.
 The icons along the bottom of this dialog allow the following functions; Create a new Reflex DataVault encrypted drive, Add a new User, Delete a User, Configure the encrypted drive, Backup encrypted password key, Restore encrypted password key, Unlock/Lock drive. The picture below shows the password configuration dialog from within the Configure drive option. The icons along the bottom of this dialog allow the following functions; Create a new Reflex DataVault encrypted drive, Add a new User, Delete a User, Configure the encrypted drive, Backup encrypted password key, Restore encrypted password key, Unlock/Lock drive. The picture below shows the password configuration dialog from within the Configure drive option.
User access to these options is restricted.
[Full Screenshot]
Reflex DataVault Shredder
If you have data that is valuable (or sensitive) enough to merit using a product like Reflex DataVault, it also follows that when you delete such data the deletion should not be reversible.
The Reflex Data Shredder is a program that functions just like the Windows Recycle Bin, except that when files are dropped on it they are erased securely. Alternatively, you can select files and folders in any Explorer, My Computer or My DataVault window and right (option)-click on them to reveal a new entry in the popup menu - Shred. Select this option and any files or folders will be deleted.
The number of data overwrites performed by Data Shredder can be configured by right (option)-clicking on the Data Shredder icon on the desktop and selecting Properties from the popup menu.
 To the left is the Reflex Data Shredder icon, to the right is the options page accessed via this icon. Medium level security is selected giving 8 overwrites of any data to be destroyed. To the left is the Reflex Data Shredder icon, to the right is the options page accessed via this icon. Medium level security is selected giving 8 overwrites of any data to be destroyed.

[Full Screenshot]
|
|


